Any of you that have cooked aboard a small sailboat know this is no insignificant feat. But today's breakfast was easy. Hash Beef, Eggs, Tomatoes, and Bannanas. OJ and, the most important part of any breakfast onboard, hot, steamy, coffee! Of course, my enthusiasm for making breakfast is to get to the next part of the day, a day under sail with the new Asym Spinnaker.
Over night I raised the sail a dozen times, mentallly walking through each of the steps in setting up the sail. By the time we were headed down wind I was ready.
Setup the Tack line, worked out perfect. Attached the spin halyard, perfect, but I do need a cleat on the mast to secure the haul end of the halyard. Sheet ran aft, first problem. Not long enough, they need to be 10 feet longer each side. The sheet lines were from our 150% jib, and that doesn't require that the sheets run outside of the forestay. So I'll buy new sheets later in the month.
Already to hoist, the halyard pulled the head of the sail in it's sock up to the masthead. Looked good from the foredeck. With everything setup, time to deploy. The beauty of the sock system is that it makes it so easy to deploy and douse the spinnaker. Within just a few seconds, the sail was out, the light wind filled it easily.
I quickly learned that the height of the tack needs to be about the same as the height of the clew. If the tack is lower, then it dramatically reduces the effective angle of the sail to the wind. The tack was secured to the port cabin top winch, so it was easy to adjust the tack height. For now I made a temporary 'tacker' using a piece of webbing to keep the tack close to the forestay.
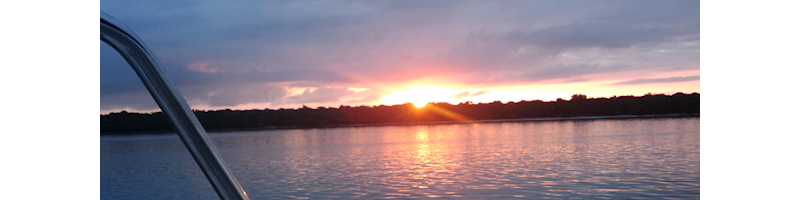
So, here's some of our pics.

Here's looking up the furled jib, those marks on the spinnaker are stains, I need to figure out how to deal with them or how to ignore them. You can just make out the spin sock at the top, it has the dousing lines attached.

Once the tack was about the same height from the deck, I could sail with the wind further astern. I'll make a more efficient tacker device before our next sail.

The sheets are lead aft to a block secured to a line onto the aft cleat. Then they run into the cam cleats mounted on the combing. This setup works great, but the block needs to be an inch or so forward.
A shackle would be just about the right extension.
Note I need to clean out the butyl, the grey stuff that seals the cam cleat where it meets the combing. You can't see it in this pic, but there is a stainless steel stirrup that keeps the sheet inline with the cams. I used Red and Green cam cleat caps to make it easy when asking Peggy to adjust the Spin sheet.

A really light wind sailing day, ideal for our first experience with the new sail.
We got back to the anchorage around 5pm, time enough to put up the pop top, JD's hat, and prep dinner. Stew and Veggies on the menu tonight with Key Lime Pie for desert, a couple of glasses of Pinot Grigio, and put our feet up to watch TV. That was another upgrade that turned out great. We replaced the Shack TV antenna for a Shakespeare Omni Directional with a much better pre-amp. There are at least a dozen channels open down in that part of Biscayne Bay.
As the night passed, most of the power boats headed home. By dawn there were a half dozen sail boats around the anchorage, some, shallow keels like us were inside the no-wake zone off of Sand Key, the others, deeper keels, needed that extra depth and stayed just outside the bouyed area.
There's a cold front headed our way. Temps are due to drop below 50degrees in the next 24 hours, so it's gonna get chilly.
So welcome 2012!
To do's before the next trip...
- Get the Garmin ST40 Wind Instrument fixed. The Transducer wire is corroded and probably broken inside the mast. The face of the Instrument is crazed and it's difficult to read in bright light.
- Removed the Transducer from the mast head, leaving a messenger line in place to facilitate re-installation.
- Removed the Display from the Cockpit bulkhead, Covered hole with Masking tape.
- Shipped the complete unit to Raymarine in NH.(1/25/2012)
- The tracking code allowed me to find out that the package arrived on Jan 30th. at Raymarine. So we should get it back next week (some time after Feb 6th.)
- Good news/Bad news. Raymarine got back to me yesterday (Friday Feb 10th) the Bezel on the Display is an easy fix, but the Transducer is shot :( So we need a new one. The Good news is that it will only cost us about $10 more than the check we sent for the repair of the two items. :)
- Installed and Tested :)
- Get longer sheet lines for the Spinnaker.
- Install two new cleats on the mast for the Spin Halyard and the Sock control lines.
- Got the cleats at the Miami Strictly Sail show. (Plus a new sail bag for the Jib, and new cusions for the cockpit (they'll take 6 weeks :( )
- Extend the sheet blocks forwards.
- Service the Nissan outboard. New Impeller, Oil change (and I'll remember to put fresh oil in the top end too!)
- Replace the 6 year old aluminum hard link between the rudder and outboard.
- That was easy! Took less than an hour to manufacture, another 30 mins and it was installed. Sweet!
- Replace the dink's outboard support plate that is on the Mast support post. (It's plywood and is really showing it's age)
- Check out the Electric Bilge pump, I noticed that it was not running in Manual mode. Might need a new pump cartridge, or it's an electrical issue.
- Looks like the Manual power line from the Bilge control panel to the actual pump. The pump runs fine in Auto Mode with the float switch raised. Will set about replacing the wire Sunday.
- Isolate the electrical system to detect where we're losing some battery power.
- Strip off the stripes on the hull and replace with the new ones we bought from Catalina Direct.
- Got started on this project. First step was to peel off the old stripes. Well, I got the first one off. Top Port side, took an hour and half. The tough bit was getting started, but I have figured that out. Just use a razor to cut between the tape and the glue, careful not to dig into the gel coat. Then with about 1/4" of tape separation, slooooowly pull directly away from the hull, very slowly, about 1" per 20 seconds. And if there are any nicks in the tape, it will break and you have to start over peeling a new edge. So the secret is to concentrate and as soon as the tape begins to tear, then use the blade to lift the torn piece, just cut into the glue horizontially while keeping tension on the intact piece of tape. Hopefully the next piece will be quicker having figured this out.
- Ok, the silver/grey stripe was even tougher to remove! But nothing compared trying to get the adhesive off the hull. After trying a several possible solutions, Goof Off finally won out. So the process is:
- Soak a small rag in Goof Off and wipe the glue surface.
- Within 2 or 3 seconds, use a plastic scraper to remove some of the adhesive.
- It has to be done quickly as the adhesive/goof off mix become tenacious within about 3 to 4 seconds. So the secret is to do it in very small segments.
- Using this technique, I was able to remove the glue from the hull left by both stripes in less than an hour. Removing the boat name graphic took less than an hour all told, including the glue.
- Get the new Boat Name Graphics and replace the worn ones on both sides (a pressure cleaner can take them off in no time. So it seems!)
- This was no big deal. Having figured out how to remove the stripes, removing the name and catalina logo was easy.
- A local Sign company made up the new Vinyl lettering, including the Catalina 250 logo.
- Looks good.